 printablelabelstemplate
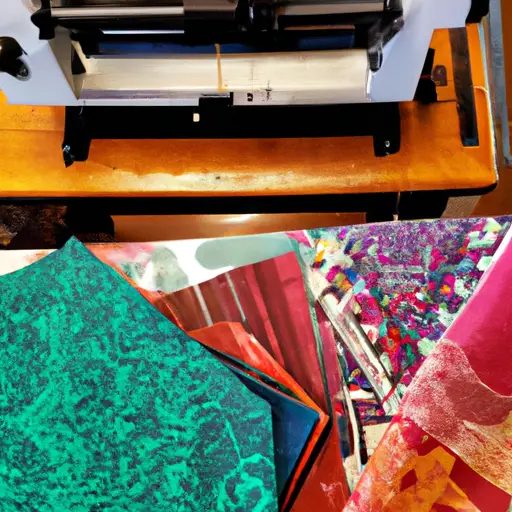
Screen printing and block printing are two popular techniques that allow textile enthusiasts to unleash their creativity and add a personal touch to their fabric designs. These DIY methods offer a unique and innovative way to create custom prints, whether it’s for clothing, home decor, or art projects.
By learning these techniques, textile enthusiasts can explore the world of printmaking and discover the endless possibilities it offers.
In the world of screen printing, artists use a mesh screen, a squeegee, and ink to transfer their designs onto fabric. This technique allows for precise and detailed prints, making it a favorite among professionals and hobbyists alike.
On the other hand, block printing involves carving a design onto a block of material, such as linoleum or wood, and then using it as a stamp to create repeated patterns on fabric. Both techniques require careful attention to detail and an understanding of the materials and tools involved.
With the right knowledge and practice, anyone can master these techniques and create stunning prints that reflect their unique style and personality.
So, whether you’re a beginner or an experienced textile enthusiast, it’s time to get crafty and explore the world of DIY screen printing and block printing.
Techniques and Materials for DIY Screen Printing
The utilization of various techniques and materials is essential for achieving successful DIY screen printing, allowing textile enthusiasts to create intricate and visually appealing designs on their chosen fabrics.
One of the key techniques used in DIY screen printing is the creation of a stencil. This can be done by cutting out the desired design onto a piece of paper or a stencil film. The stencil is then attached to a screen, which is a mesh fabric stretched tightly over a frame. The screen is coated with a photosensitive emulsion, which reacts to light. When the screen is exposed to light, the areas covered by the stencil remain unexposed, while the rest of the screen is exposed. This creates a stencil on the screen, allowing the ink to pass through only in the desired areas.
Another technique commonly used in DIY screen printing is the application of resist materials. These materials are used to block the ink from reaching certain areas of the fabric. This can be done by applying a resist paste directly onto the fabric, or by using masking tape or wax to cover the areas that should remain ink-free.
By combining these techniques, textile enthusiasts can create intricate and visually appealing designs on their fabrics.
In addition to the techniques, the choice of materials is also crucial in achieving successful DIY screen printing.
One of the most commonly used materials in screen printing is the ink. There are various types of inks available, including water-based, plastisol, and discharge inks. Each type of ink has its own unique properties and advantages, allowing textile enthusiasts to achieve different effects on their fabrics. For example, water-based inks are known for their soft and breathable finish, while plastisol inks provide vibrant and long-lasting colors.
Another important material in DIY screen printing is the fabric itself. Different fabrics have different characteristics, such as their weave, weight, and fiber content, which can affect the final outcome of the print. It is important for textile enthusiasts to choose the right fabric for their project, considering factors such as the desired effect, durability, and comfort.
By carefully selecting the techniques and materials, textile enthusiasts can unleash their creativity and achieve innovative and visually stunning designs through DIY screen printing.
Exploring Block Printing and its Tools
Exploring the art of block printing involves delving into the various tools used in this technique.
Block printing is a traditional form of printmaking that originated in East Asia. It involves carving a design onto a block of wood or linoleum, applying ink to the block, and then transferring the design onto paper or fabric.
The tools used in block printing include carving tools, ink rollers, and a brayer. Carving tools are used to carve the design onto the block, and they come in various shapes and sizes to create different effects.
Ink rollers, also known as brayers, are used to apply the ink evenly onto the block. They are typically made of rubber and have a handle for easy maneuverability. Additionally, a brayer can be used to apply pressure to the back of the paper or fabric to ensure a clean transfer of the design.
Other tools used in block printing include a bench hook, which is used to secure the block while carving, and a baren, which is a handheld tool used to apply pressure to the back of the paper or fabric during printing.
Block printing tools are essential for achieving precise and intricate designs. The process requires a high level of skill and precision, as any mistakes made during carving or printing can be difficult to correct.
However, the tools also offer a level of creativity and innovation to the artist. The different shapes and sizes of carving tools allow for a wide range of design possibilities, from fine lines to bold textures. The ink rollers and brayers enable the artist to control the amount of ink applied to the block, resulting in variations in color intensity and texture.
This combination of tools and techniques allows for endless possibilities in creating unique and innovative prints. Whether it’s creating intricate patterns on fabric or making art prints, block printing tools offer textile enthusiasts a way to explore their creativity and bring their designs to life.
Step-by-Step Guide to Block Printing on Fabric
A step-by-step guide to block printing on fabric involves a systematic process of carving a design onto a block, applying ink with an ink roller, and transferring the design onto fabric using a brayer and pressure.
The first step is to choose a design and transfer it onto the block, which is typically made of wood or linoleum. Once the design is transferred, the next step is to carefully carve the design into the block using carving tools. This requires precision and attention to detail, as any mistakes or inconsistencies in the carving process can affect the final print.
After the block is carved, it is important to clean it thoroughly to remove any debris or excess ink that may interfere with the printing process.
Once the block is prepared, the next step is to apply ink onto the surface of the block using an ink roller. The ink should be evenly distributed on the roller and then rolled onto the block in a smooth, consistent motion. This ensures that the design is evenly coated with ink and will result in a clean and clear print.
After the block is inked, it is time to transfer the design onto the fabric. This is done by placing the fabric on a flat surface, positioning the block on top of the fabric, and applying pressure using a brayer or a similar tool. The pressure helps to ensure that the ink is transferred onto the fabric evenly and accurately.
Once the pressure is applied, the block is carefully lifted off the fabric, revealing the printed design. This process can be repeated to create multiple prints or to add layers of different colors to the design.
Conclusion
In conclusion, DIY screen printing and block printing are two exciting techniques that allow textile enthusiasts to unleash their creativity and create unique designs on fabric.
By using various materials such as screens, stencils, and inks, individuals can achieve professional-looking results right in the comfort of their own homes.
The step-by-step guides provided in this article offer a meticulous and detailed approach, ensuring that beginners and experienced crafters alike can successfully embark on their printing projects.
Screen printing offers a versatile and precise method for transferring designs onto fabric, while block printing provides a more hands-on and artistic approach.
Both techniques require patience and attention to detail, but with practice, individuals can master the art of printing their own textiles.
Whether it’s creating personalized clothing, home decor, or gifts, these printing techniques allow individuals to express their unique style and add a touch of handmade beauty to their lives.
So, grab your tools, get crafty, and let your imagination run wild as you dive into the world of DIY screen printing and block printing.
The possibilities are endless, and the satisfaction of creating something truly one-of-a-kind is priceless.